
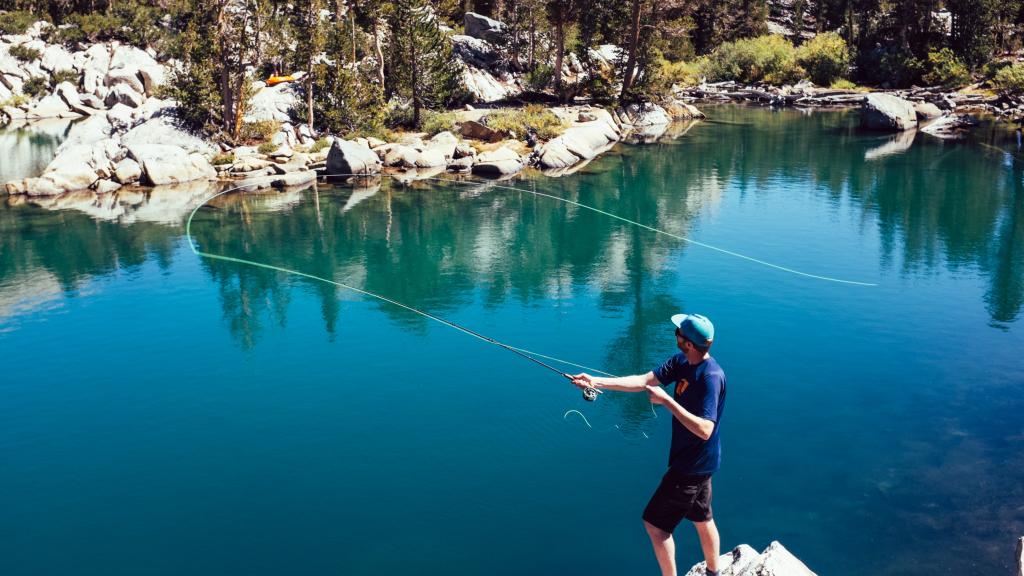
Fly fishing has a reputation for being complicated, and I won't pretend that reputation is entirely undeserved. The first time I tried to cast a fly rod, I managed to hook my own jacket twice, put the fly in a tree, and spook every fish within thirty metres. But here's the thing — within a few sessions, something clicked. The rhythm of the cast started to feel natural, the line started to behave, and I began to understand why people dedicate their entire fishing lives to this method.
This guide covers everything a beginner needs to get started: the gear, the setup, the cast, and how to handle fish once you've actually caught one.
What Makes Fly Fishing Different
In almost every other form of fishing, the weight of the lure or lead carries the cast. In fly fishing, the fly itself is nearly weightless — it's the line that carries the cast. This reversal of logic is what makes fly fishing feel strange at first and deeply satisfying once you've got it. You're casting the line, not the fly. The fly just goes along for the ride.
This also means the rod, the line, and the leader all have to work together as a system. Get any one of them wrong and the whole thing falls apart. Get them right and you can place a tiny dry fly on a precise spot twenty metres away with a delicacy that no other fishing method can match.
Choosing Your First Fly Rod
Fly rods come in a range of lengths, weights, and actions, and the choice matters more than in most other types of fishing because everything else in the setup is calibrated to match the rod.
Length is the first decision. For most beginners fishing rivers and small lakes, a rod in the 8–9ft range (2.4–2.7m) is the right starting point. It's manageable, versatile, and works well in the kind of mixed conditions you'll encounter while you're learning. Longer rods — 10ft and above — are better suited to large open rivers and lakes where you need to mend line and control drift over distance.
Weight class determines the rod's power and the line it's matched with. For beginners targeting trout and general coarse species, a 4–6 weight rod covers almost everything you'll encounter. Go lighter (2–3 weight) and you're into specialist territory for small streams and tiny flies. Go heavier (7–9 weight) and you're looking at pike, salmon, or saltwater fishing.
Action affects how the rod loads during the cast. A medium action rod bends through the middle section and is forgiving and easy to learn on — the timing window for the cast is wider, which matters when you're still developing feel. A fast action rod bends mainly in the top third, loads quickly, and is excellent for distance casting, but it's less forgiving of timing errors. For a first rod, medium or medium-fast is the sensible choice.
The Rest of the Setup: Reel, Line, Leader, and Fly
The reel. A fly reel is simpler than it looks. Its main job is to store the line and provide drag when a fish runs. For most trout fishing, a basic click-pawl drag is sufficient. What matters more is that the reel is matched to the rod weight — a reel designed for a 5-weight rod on a 5-weight rod. The reel seat on the rod holds it in place; make sure it's snug and doesn't wobble before you start fishing.
The line. Fly line is the engine of the cast. It's thick, heavy, and coated — nothing like monofilament or braid. The line weight must match the rod weight (a 5-weight rod takes a 5-weight line). For beginners, a weight-forward floating line is the standard choice — it loads easily, casts well, and works for the majority of fly fishing situations. Before the fly line goes on the reel, a backing line is wound on first to fill the spool and provide reserve line if a big fish runs.
The leader and tippet. The leader is a tapered length of clear monofilament that connects the fly line to the fly. It's tapered — thick at the fly line end, thin at the fly end — so that energy transfers smoothly through the cast and the fly lands gently. The tippet is a short section of fine fluorocarbon or mono tied to the thin end of the leader, making the connection to the fly nearly invisible in clear water. In gin-clear conditions, a longer, finer tippet makes a real difference to how many fish you spook.
The fly. This is where fly fishing gets genuinely interesting. Dry flies sit on the surface and imitate adult insects — the classic image of a trout rising to take a fly off the top. Wet flies and nymphs fish below the surface, imitating larvae, pupae, and drowned insects. Streamers are larger, more mobile patterns that imitate small fish and are excellent for pike and larger trout. If you're just starting out, a small selection of fly sets covering a few dry flies, a couple of nymphs, and a streamer or two will cover most situations.
Assembling the Rod
Before you cast, the rod needs to be put together correctly. Most fly rods come in two or four sections. When joining the sections, align the guides so they form a straight line from handle to tip — this matters for how the line runs during the cast. Push the sections together firmly but don't force them. The connection should be snug without being jammed. Some anglers use a little wax on the ferrules to improve the grip and prevent sections from working loose during fishing.
Once assembled, attach the reel to the reel seat and tighten the locking ring until it's firm. Thread the fly line up through the guides from the reel, attach the leader, and tie on the tippet and fly. Check everything is straight and the fly is tied securely before your first cast.
Learning to Cast: The Overhead Cast
The overhead cast is the foundation of fly fishing. Everything else — the roll cast, the curve cast, the reach cast — is built on top of it. Get this right and the rest follows naturally.
The cast has four phases:
1. Preparation. Strip enough line off the reel to make the cast you want. Hold the rod at roughly the ten o'clock position with the line hanging in front of you. Keep your grip firm but relaxed — a tight, tense grip kills the feel of the rod loading.
2. The backcast. Lift the rod smoothly and accelerate to a stop at roughly the one o'clock position behind you. The key word is accelerate — the rod needs to be moving faster at the end of the stroke than at the beginning. Stop cleanly. This stop is what loads the rod and sends the line behind you in a loop.
3. The pause. Wait. This is the part beginners rush, and it's the most common reason casts fall apart. The line needs time to straighten out behind you before you move forward. You'll feel the rod load slightly as the line pulls on the tip — that's your cue to start the forward cast.
4. The forward cast. Drive the rod forward from one o'clock to ten o'clock, again accelerating to a clean stop. The line will unroll forward in a loop and lay out in front of you. Let it settle, then lower the rod tip to follow the line down.
The most common mistakes are rushing the pause (the line hasn't straightened behind you before you go forward), using too much wrist (which opens the loop and kills accuracy), and applying force unevenly (which creates a wide, collapsing loop instead of a tight, efficient one). The fix for all of them is the same: slow down, feel the rod load, and let the timing come to you rather than forcing it.
Advanced Casting: False Cast, Curve Cast, and Loop Control
Once the overhead cast is consistent, two techniques are worth adding early.
The false cast keeps the line in the air through multiple forward and backward strokes without letting it touch the water. It's used to extend line, adjust direction, and dry out a waterlogged dry fly. The key is keeping the loops tight and the movements smooth — false casting with wide, sloppy loops just tangles things up.
The curve cast redirects the line mid-flight by rotating the wrist slightly at the end of the forward stroke. It's invaluable when you need to present a fly around an obstacle — a rock, a branch, a patch of weed — without repositioning yourself. It takes practice but becomes intuitive quickly.
Loop control is less a specific technique and more an awareness that develops over time. A narrow, tight loop carries further, cuts through wind better, and lands more accurately. A wide loop is slower and less precise. The width of the loop is controlled by the arc of the rod stroke — a shorter, more precise stroke creates a tighter loop. Watching your loop in the air and adjusting the stroke accordingly is one of the most useful habits to develop early.
River vs Lake: Adjusting Your Approach
Fly fishing in rivers and lakes requires different thinking, even if the casting mechanics are the same.
On rivers, the current does a lot of the work for you. A dry fly or nymph drifted naturally downstream on a slack line — a technique called a dead drift — is often the most effective presentation. Fish hold in predictable spots: behind rocks, in the slacker water along the bank, at the head and tail of pools. The challenge is reading the current and mending the line to keep the fly drifting naturally without drag. Strike indicators are useful for nymph fishing in deeper runs — they act like a float and show takes that you'd otherwise miss.
On lakes, there's no current to help you. You're retrieving the fly yourself, and the retrieve speed and style become the key variables. A slow, figure-of-eight retrieve with a wet fly or nymph just below the surface is a classic lake technique. Streamers retrieved in short, sharp strips imitate fleeing baitfish and are excellent for trout and pike. The most productive areas are weed edges, drop-offs, and anywhere with structure — the same logic as any other form of fishing.
Playing and Landing Fish
Fly fishing changes the way you play fish. There's no drag system doing the work for you in the same way — you're managing line with your hand, stripping it in or letting it run through your fingers as the fish dictates. Keep the rod high to absorb runs, and never let the line go slack. A slack line is a lost fish.
For landing, a soft-mesh landing net is the right tool. It's kinder to the fish and far more reliable than trying to grab a tired trout by hand. If you're releasing the fish — which is good practice for most wild trout — keep it in the water as much as possible, support it gently until it kicks away under its own power, and avoid touching the gills. A fish handled well has every chance of surviving.
Looking After Your Fly Rod
A fly rod is a precision instrument and it repays careful handling. After every session, wipe the blank and guides with a damp cloth to remove grit and salt. Pay particular attention to the ferrule connections — sand or grit in the joints will wear them over time. If you've been fishing in saltwater, rinse the whole rod thoroughly with fresh water.
Store the rod in its protective tube or sleeve, broken down into sections. Don't leave it assembled in a car — temperature extremes weaken the blank and can cause sections to seize together. Before each session, run your fingers along the guides to check for chips or rough edges that could fray the line. A damaged guide is a small problem that becomes a big one mid-cast.
Fly line accessories — line cleaner, dressing, and conditioner — are worth using regularly. Clean, dressed line shoots through the guides smoothly and floats better, which matters more than most beginners realise.
Getting Started
Fly fishing rewards patience and practice more than almost any other fishing method. The first few sessions are about developing feel — for the rod loading, for the timing of the cast, for the way the line behaves in the air. It doesn't come instantly, but it comes faster than most people expect.